Showing posts with label dessert. Show all posts

Friday, November 12, 2010

Egg white almond cake


Almond taste and light consistency are the main criteria for this cake. Inspiration for this cake came from one interesting cooking blog "nami-nami" I've changed for my taste and all together it worked out well. If you have any unused egg whites and when You are sick of meringues, macaroons and Pavlova make this cake. It is so good that I wanted to make it even if there is no unused egg whites. Try it! 
160 grams almonds200 grams sugar110 grams butter1 tsp almond extract (or a few drops of almond essence)160 grams of flour1 tsp baking powder

 1) Blanch the almonds: place almonds in shells for 2 minutes into boiling water. Strain and rinse with cold running water. Peel the skin, it should slide off easily.


2) Preheat oven to 180 ˚ C.3)
Whisk together butter and sugar in a food processor, or by hand with a whisk in a bowl. Add  sifted flour, almonds, baking powder and almond extract. Blend everything in a food processor till ingredients are well mixed.

If doing by hand - chop the almonds
with a good knife or  finely shalt in pestle and mortar. Then mix with remaining ingredients.4) Separately, whip the egg whites to the stage of unstable peaks. Carefully fold beaten whites into the batter.


5) Prepare the cake tin. Smear it with butter and sprinkle with flour. Shake off excess. Tin must be coated with a a thin layer of flour. Fill the form with batter and place into the oven.Bake in oven for 40-50 minutes. Make a test with a toothpick: insert it in the center of the cake in the center, if it comes out clean - the cake is ready - if not, bake for another
5-8 minutes and make the test again.


Once you take the cake out , let it cool for 5 min before unmolding. Then I suggest to cool another 10 minutes on a rake before You start slicing.

Enjoy! 

Thursday, November 11, 2010

The best basic pastry shell dough


It’s just the best tasting, best in flavor and the easiest to work with dough I have ever made. The recipe is not mine. I’ve found it accidentally on www.smittenkitchen.com  . It works and it’s flavourful without adding any artificial shortenings, no eggs and a little work involved.


Then best about pastry dough that You can double the amount, and keep the rest into freezer up to several months, and up to a week in a fridge.

The main rules while making pastry dough are:
1) All the ingredients should be cold before mixing. You can even place  in a fridge your bowls and pastry blender that You are going use.
2) Mix all the dry ingredients first, stir well then add diced butter.
Pre-cut butter into cubes! Do not through the whole lump in. It’s better to refrigerate butter cubes for a while after dicing (15 min should be enough).


3) Work fast not to let Your ingredients to warm up. If You work with hands, you can cool Your hands under cold running water just before You start.
4) Do not overwork the dough. Tiny visible pieces of butter in the dough is ok. They make the crust tender and the dough flaky.
5) If You make the dough in food processor, use impulse function. Flick by flick, and watch the consistency. Do not forget about tiny butter pieces:-). You may start it food processor, then end in a cold bowl, assembling the dough together with Your hands. 

Though: I must admit, after many trials, I prefer to make my dough with hand pastry blender, not in food processor. The result is much better.
6) Refrigerate dough for 1-2 hours before using. Overnight is even better!

So here is the recipe:

Makes 2 open pie 23 cm shells or you can roll it into 1 closed 28 cm pie. 


320 gram flour
1 tablespoon sugar
1 teaspoon salt
225 gram butter, diced 1 cm dice
125 ml ice cold water


1) In a bowl mix sifted flour, sugar and salt. Mix well and add butter.


2) Work butter into the flour with pastry blender or hands. (You can also make it in food processor by impulse blending)
3) Add ice water to bind the dough. Add half first and then another half. Working the dough with Your hands and form a ball. 

Press dough down to make a disc and wrap with food foil. Place into fridge for 1-2 hours or even overnight.


4) After resting, roll out the dough.


Carefully transfer rolled dough into the tart baking mould. Rest it for 1 hour more in fridge to prevent it from shrinking.

 And follow the recipe…

You can fill the shell according to the recipe or blind bake the shell first if the recipe calls for it. I will write separately about blind baking.


P.S. If You want to make special sweet pastry dough for fruit tarts, add 16 grams of vanilla sugar and 2 tbsp of caster sugar to the main dough.

Sunday, October 31, 2010

Poppy seed cake - My husband's Birthday Cake


Delicate  and light cake with pleasant cherry-poppy taste. Easy to make and interesting as a treat. My husband said about taste "This cake is like poetry!". Such lyric cite filled me with joy:-)

For cake:
130 gram poppy seed
250 ml milk
220 gram butter
230 gram sugar
3 eggs
200 gram flour
1/2 tsp. salt
2 1/2 tsp. baking powder
3 tsp. vanilla extract (Or 10 grams of vanilla sugar)

For cream and feeling:
700 ml cream 33-45%
8 gram vanilla sugar
2 tbsp caster sugar


1)      Place poppy seed in milk, bring to a boil, and set it aside for 1 hour. Then smash it lightly in mortar and pestle. But You can skip this step, it just brings out more flavor.
2)      Separate eggs. 

3)      Preheat oven to 180˚C. Beat butter and sugar together until creamy. Beat in egg yolks and add vanilla extract or sugar.

Add poppy seed-milk mixture. In separate vessel mix sifted flour, salt, and baking powder, mix well; stir into dough.
4)      Beat whites of eggs until stiff, and fold them gently into the dough. 

5)      Grease a large cake pan (28-32 cm) with butter. Sprinkle flour over sides so they are covered with a thin film. 


Fill the pan, and bake approximately 1 hour. If a toothpick inserted in the middle comes out clean, the cake is ready.
6)      Take it out and let it cool down before unmolded. And then transfer to rake to cool down. You can even refrigerate it for a while once cool. Cold cake is easier to handle.
7)      In the mean time prepare the filling: Whip cream mixed with vanilla and regular sugar until it’s fluffy and stiff. 


Place it into the fridge for 15 min.
NOTE: Cream before whipping should be properly chilled!
8)      Assembling of the cake:
If the surface of the cake is uneven, slice off a bit of the top. Slice cake into 2 even layers using knife or cake cutting tool. 

Spread generously whipped cream (half of it) over the top of one layer (cut side). Distribute cherries evenly over it. Place the second layer on top.  Coat the whole cake with the rest of cream. Decorate with leftover cherries or as You like. 


Keep in fridge before serving!

I’ve taken 30 % fat cream. It’s harder to handle, it’s less stable. But it’s so light and melting in Your mouth. It’s up to You if to take cream with higher fat content. Just do not take less than 30 %. 


Sour Cherries in Alkohol

Easy to make, perfect filling for desserts and cocktail treat for adults!

600 gram fresh or frozen sour cherries
160 ml water
160 gram sugar
8 gram vanilla sugar
250 ml rum or Cognac (You can use even vodka)


1)      Wash and pit cherries. Place into clean jar.
2)      In a pot over medium bring water, castor and vanilla sugar to the boil. Stir until sugar is dissolved. Pour over the cherries. Set aside to cool down.
3)      When the syrup and liquid are quite cool, add alcohol. Keep in cool place for 2-3 weeks and You have tasty treat and delicious liquor. 

Sunday, October 24, 2010

Super tender pear pancakes


You know, I have never eaten more tender melting in Your mouth pancakes. They are so fruity and not floury at all! My husband even doubted if You can call it pancakes, because You can’t feel the dough while enjoying sophisticated vanilla pear taste… 

Serves 2

500 gram pears (semisoft)
1 egg
2 tbsp all-purpose flour
8 gram vanilla sugar
¼  tsp baking powder
1,5 tbsp sugar
Vegetable oil for frying


1)      Grate pears  coarsely (using the biggest grater’s holes).  Transfer it to the colander and drain slightly.
2)      In a bowl mix flour, baking powder, vanilla and castor sugar. Stir well and add an egg.


            Stir again until everything incorporated. Add pears. Stir, but not to much. Less stirring means more tender pancakes.  


  3)      Pre-heat a frying pan. Add a dash of vegetable oil, just not too much. Drop a large spoonful of batter into  the hot pan and flatten it out a little, otherwise You’ll have problem to getting them cooked in the center before the skin in burnt. Do not overcrowd the frying pan and fry over low to  medium heat. Flip over when the skin starts turning golden brown underneath and fry 2-3 minutes more. 

 
4)      Then fry another batch of pancakes.
Serve with chocolate or vanilla ice-cream and chocolate sauce. 


 For a homemade chocolate sauce:
Melt  100 grams of dark chocolate over water-bath and add 50 ml of hot double cream. Stir well and energetically until incorporated.
 For extra shine add a bit (10 grams) of cold butter in the end, and mix well.

Friday, October 8, 2010

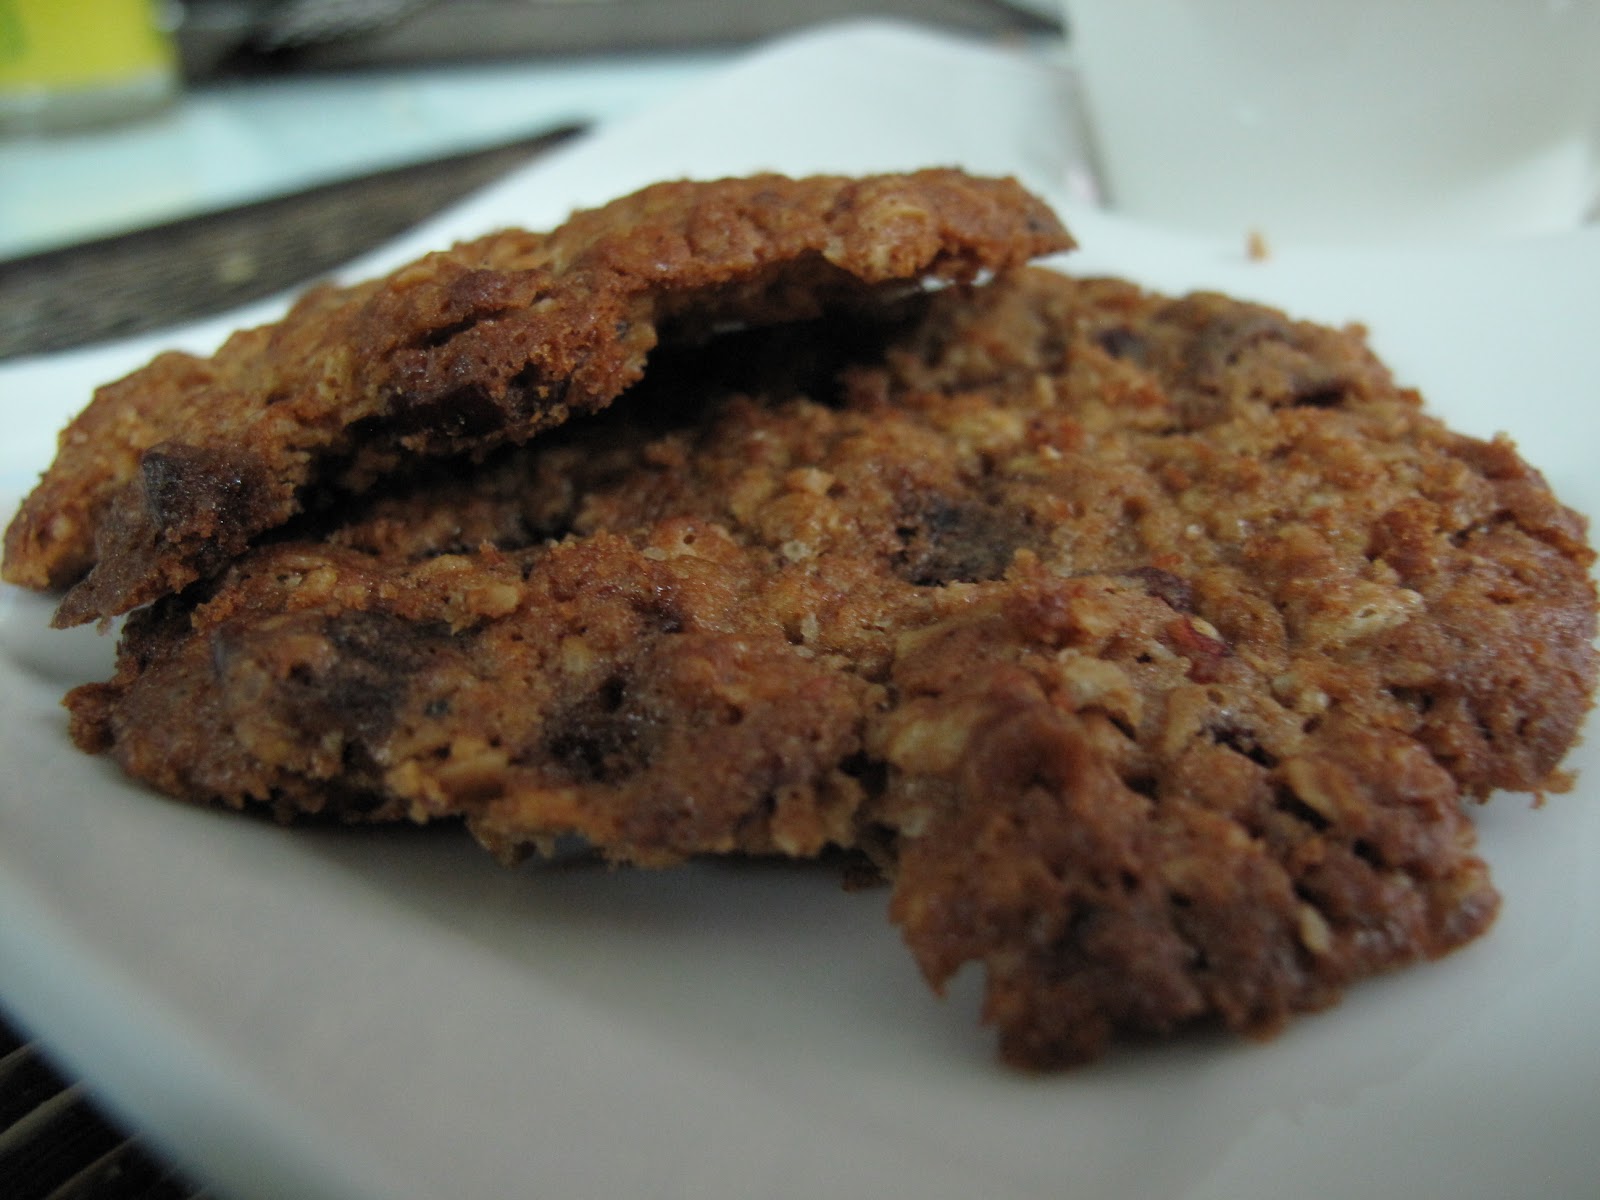
Crunchy Oatmeal Cookies

    I just felt like having some oatmeal cookies. After reading some recipes, pondering on what I really want, I made my own cookies. Just crunchy sweet treat to boost Your energy level . Perfect match for coffee or tea. Easy to make, easy to bake. Go ahead and make some!

120 gr butter
1 egg
40 grams of white sugar
40 grams of brown sugar
60 gram flour
90 grams of rolled oats
30 grams of dried cranberries (You can subtitute with raisings or any other dry fruits)
1/4 teaspoon of ground cinnamon
1/2 teaspoon of baking powder
Preheat oven to 180 ˚C.


1) Beat together butter, sugar and an egg. Make it with a whisk in a bowl or in food processor. The mass should be light and fluffy.

2) Chop cranberries. In a separate bowl mix baking powder, cinnamon, flour, cranberries, oats.


Stir well and carefully transfer to the butter mixture. Mix well until all ingredients are combined.


3) Prepare a baking sheet smearing it thinly with melted butter. Drop spoonful of dough on the sheet and go on spoon by spoon making about 2 cm intervals.


4) Flatten the dough slightly with wet fingers. Place in the hot oven for 15-20 min.
Take out when cookies start getting slightly browned.


BE CAREFUL: Watch out not to burn cookies. Take them out when they are still soft and let them cool down on the baking sheet out of the oven. They will become crunchy in few minutes.

Sunday, October 3, 2010

Almond biscotti with orange hint

   
Those who happened to be in Italy must have tried that wonderful cookies known worldwide. The object of Italian pride. They dip it into sweet wine and send it straight to the mouth, to enjoy this intoxicating delight! Real treat for hedonist! And it’s divinely good with coffee! Everybody likes it, but not everybody knows how easy to make it at home…

200 grams almonds
110 grams butter
3 eggs
160 gram sugar
1 teaspoon almond extract (optional)
Orange zest of 1 orange
350 grams flour
1 teaspoon baking powder


Preheat the oven to 180˚ C.
Lay the almonds on a baking sheet in a single layer. Roast for 10 minutes or until the nuts are lightly toasted. Remove from the oven and let the cool on the baking sheet. It’s very important that they are completely cooled there before You add them to the dough. Otherwise forget the crunchy nuts!


When the nuts are cool cut them in half. (Kind of Cinderella workJ). Shave the orange to get the zest (Wash it properly before). If You don’t have a zester, You may do it by regular vegetable peeler then chop it by knife.
In an electric mixer, beat the butter until light and fluffy. With the mixer running, gradually add the eggs, sugar, and almond extract; mix until creamed. (You can make it all in a bowl with an regular elecric mixer)
 Add the flour and baking powder. Mix the dough until smooth. Using a plastic spatula or a wooden spoon, mix in the almonds and orange zest until evenly distributed. Divide the dough in half.


Place the dough parts on an ungreased baking sheet  and form 2 logs with Your wet hands, bake for 35 minutes or until the bottoms are lightly brown. Take them out.


Let the logs cool for 5 minutes and then place on a cutting board. Slice each log on a diagonal into 1-1,5 cm thick pieces.

Put the biscotti back on the baking sheet and bake 5 minutes. Turn the cookies over and bake the other side for another 5 minutes.
Store Your biscotti in an airtight container.


IDEA: You can use coconut flakes (60 grams) instead of orange zest and You’ll have biscotti with coconut hintJ
GF3ESXJ836K9

Monday, September 6, 2010

Pears in red wine


Delicious, a bit aristocratic and elegant, so easy to do. It looks gorgeous, tastes surprisingly. Just perfect romantic dessert with some erotic hint:-)


4 to 6 ripe pears with stems
fresh juice from 1 lemon
1 bottle of red semisweet wine
1/2 cup muscovado sugar
6 slices of peeled fresh ginger
10 whole black peppercorns
1 piece of star anis
Mint for decorations
1) Peel the pears, leaving their stems intact, and cut a thin slice from bottom of each to enable pear to stand upright when served. Slice ginger.


2)In a pot (large enough to hold the pears either laying on their sides), lay pears on their sides, add red wine, sugar, lemon juice, ginger slices, star anise and peppercorns in poaching liquid bring just to a boil, turn down the heat so the pears just gently simmer. 

3)Cover pan with a lid, turn the pears occasionally, approximately 25 to 40 minutes or until pears are tender. When done, carefully transfer pears with a slotted spoon to their serving dishes.
4) Boil down the poaching liquid until 1/3 of it is left. Remove from heat, strain, throw away ginger slices, anise and peppercorns and pour the sauce over pears. Decorate neatly with mint leaves. You may also serve it with vanilla ice-cream.
Enjoy!
It is so tempting, that those little fingers could not resist touching the forbidden dessert:-)

NOTE: The rest of sauce pour into a jar and refrigerate up to 2 weeks. You can use it as fancy fruit salad or ice-cream sauce.